
BB modeling how to safely view a partial solar eclipse
Since the April 8 solar eclipse will be partial – albeit 93% eclipsed! – as seen in Connecticut, safe viewing techniques MUST be used for the entire event! Please do not try to take a peek with just your eyes – you won’t see the eclipse clearly and you can damage your eyes.
You can safely view the partial eclipse in two ways: using solar eclipse glasses or a pinhole projector.
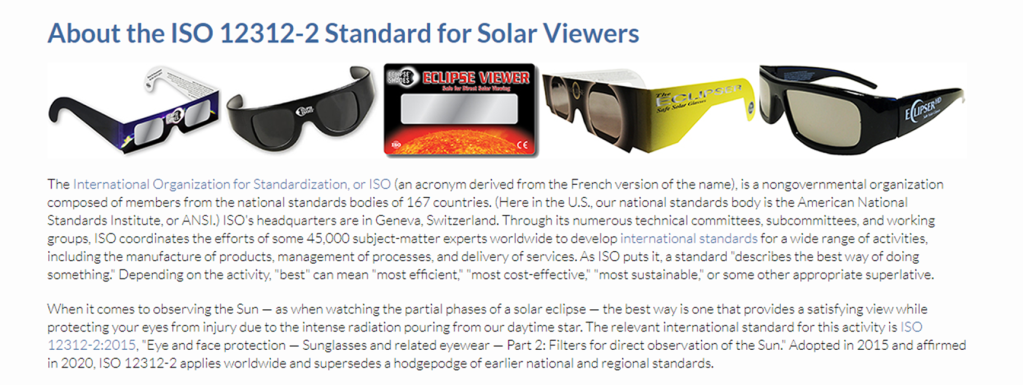
Information on safe solar eclipse glasses, courtesy of the AAS website
Solar eclipse glasses are NOT sunglasses, 3-d glasses, or any other type of optical device. They are meant to be used with JUST your eyes (not with cameras, binoculars, or other optics) but they can be safely worn over your normal eyeglasses or contact lenses. They prevent sunlight from entering your eyes, not just visible rays of sunlight but also invisible infrared and ultraviolet rays.
To make sure your solar eclipse glasses will protect your eyes, do the following:
- Purchase them from a reputable source. The AAS website has information on this. You can also get glasses for free from many local libraries.
- Make sure the glasses have the ISO seal printed on them.
- Inspect your glasses carefully before using them. Make sure the “lens” part is intact, with no cracks, creases, or spots.
Put on your solar eclipse glasses before looking up at the sun, and look away from the sun before taking them off. The sun should look relatively dim when you look through the glasses and you should not see any bright specks or lines.
You will sometimes here that #14 welders glass can be used. I would recommend against it, based on what I have read. #14 is not a common filter strength and you can’t just put two #7 together to get a #14. Also, there is some debate as to whether they actually filter out enough infrared and ultraviolet to make them safe.
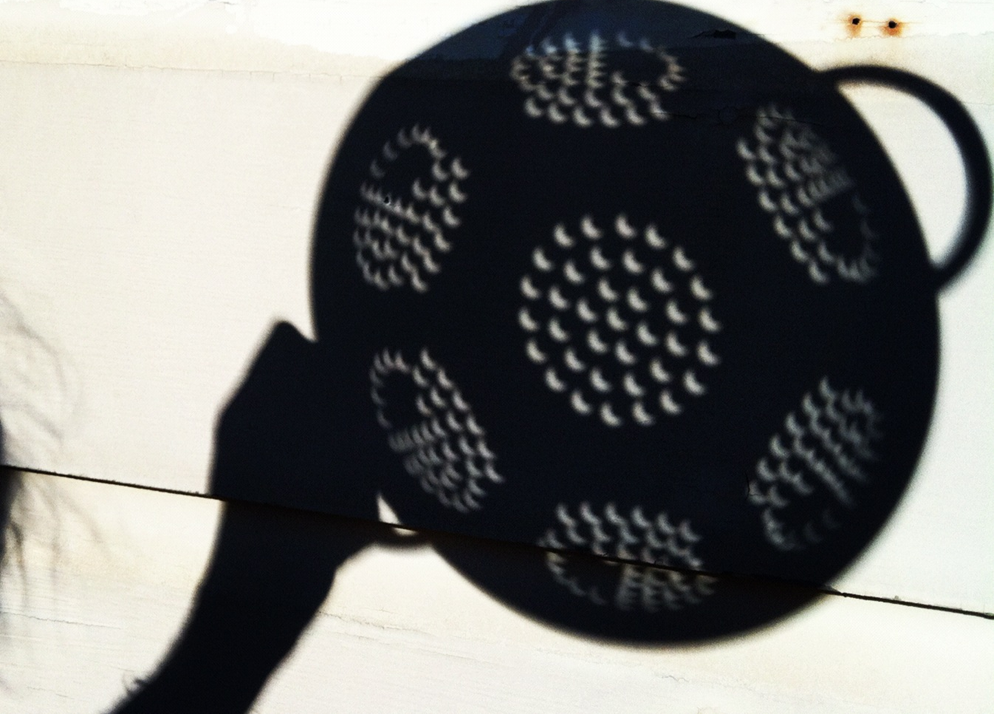
You can also make a pinhole projector. The simplest form is to take anything with holes in it, like a pasta strainer, and let the sunlight pass through it. You will see little eclipse crescents on the ground.
A step up is to take a piece of cardboard and make a clean pinhole in it. Stand with your back to the sun, and have the sunlight pass through the pinhole onto another card or onto the ground. You will also see a small image of the eclipsed sun:
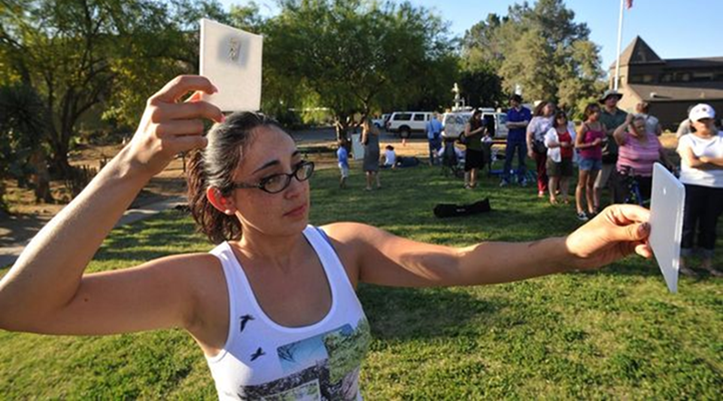
You can put a piece of tin foil in the card and poke the hole in the tin foil to get a cleaner hole.
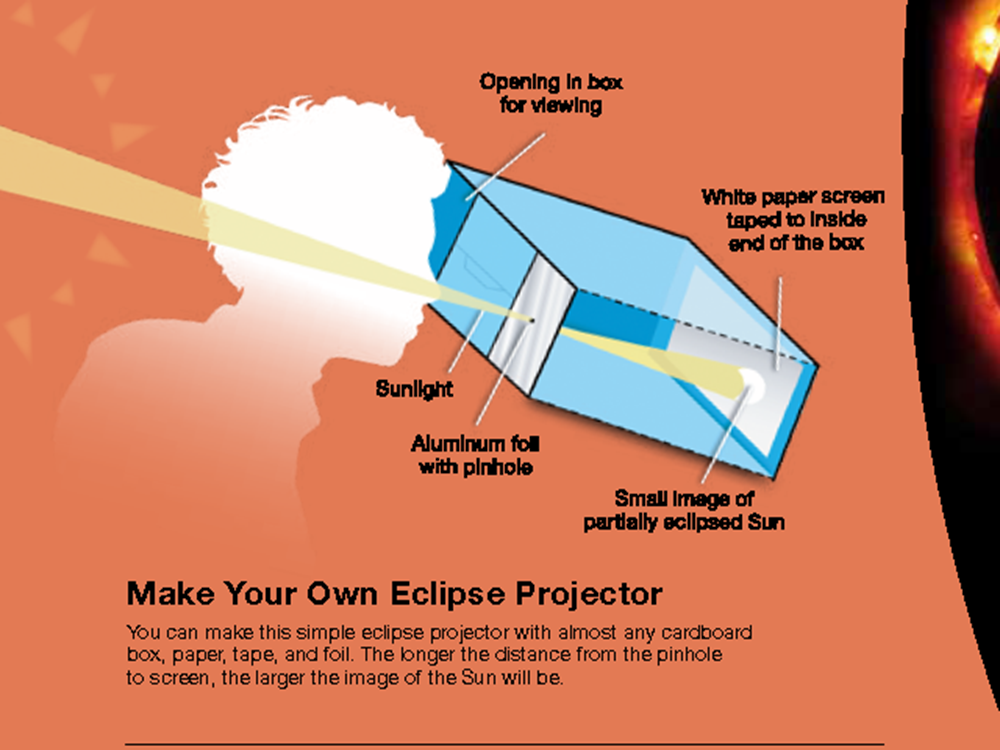
Boxes can be used in a variety of ways to make a pinhole projector, from cereal boxes to larger containers. The longer the box, the larger the sun’s image.
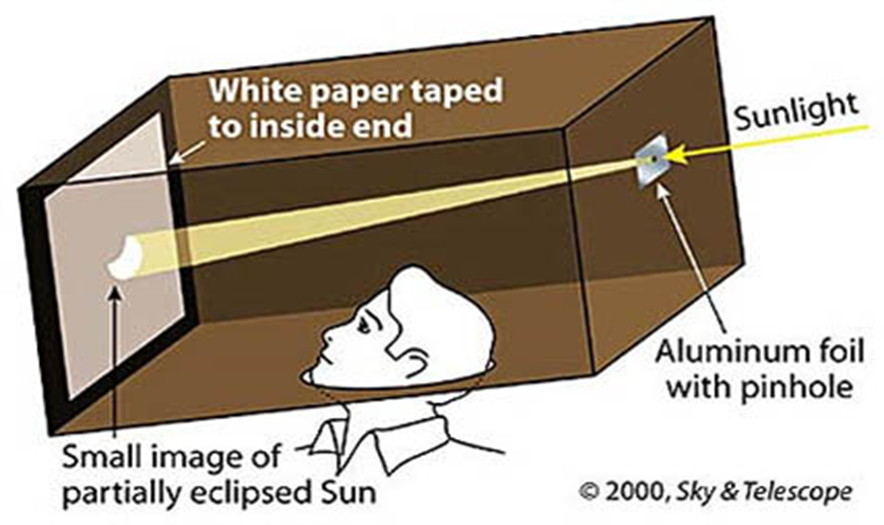
A cereal box pinhole projector, schematic (above) and actual completed version (below)

A schematic of an over-the-head pinhole projector system.
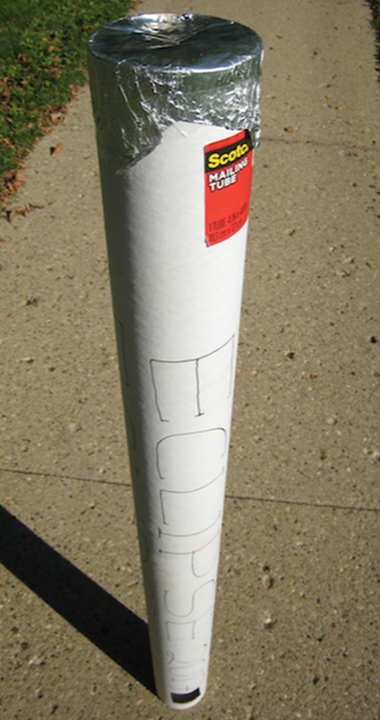
My favorite version is made from a poster tube. Take the cap off one end and cover with tin foil. Poke a small hole in the foil. This is the end you will point towards the sun. Leave the cap on the other end (to use as a screen) and cut a window in the tube near that end. You rest the tube on your shoulder with your back to the sun and you will see an image of the sun through the little window projected on the endcap screen.
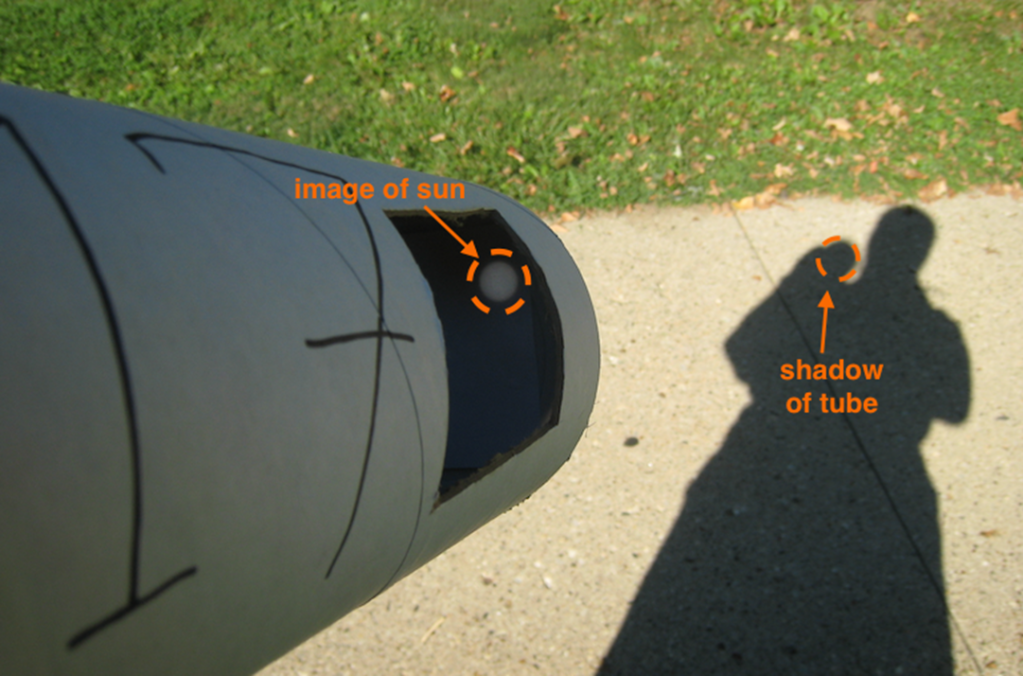
To align the tube with the sun, watch the shadow of the tube on the ground as you adjust it on your shoulder. When the shadow of the round tube looks perfectly round, you should see the sun appear inside the tube.
Rather than taking pictures of the sun directly, which requires a better filter than your eclipse glasses, take a picture of the projected image. Again, do not try to take pictures of the sun by putting your eclipse glasses on your camera! You can damage both your camera and your eyes.
In our last installment, we will discuss upcoming eclipses that you can see from the US.
